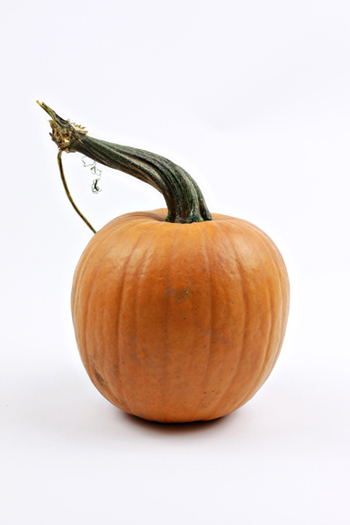
I have a confession. I don’t remember ever buying pumpkin in a can. Ever. I know my mom did when I was younger a few times, but generally, our pumpkin came from, well, a pumpkin. For years in high school I avoided pumpkin pie with it’s brown, creamy texture. Then I realized it was because I’d always had my pumpkin fresh. Fresh as in orange.
When I started cooking with pumpkin on my own, I naturally went for the fresh pumpkin, but the grocery stores sell by the pound, and when you’re paying $5 for a sugar pie pumpkin that only produces a can’s worth of purée, I can see why people would opt to buy the ready-to-go variety in the can. Lesson: Don’t buy pumpkins at the grocery store.
All of our pumpkins, aside from the ones we grew ourselves this year, come from the farmer’s market where they are priced in whole dollar amounts. I haven’t spent over $2 for a pie pumpkin in ages. They’re a dime a dozen there, and the vendors smile happily as you take the bright orange spheres away.
Preheat your oven to 350º F, and then start by cutting your pumpkins in half. This can be a bit tricky, but I’ve found that getting a good slice in it and then sticking the knife in and guiding it around works best for me. My husband just slices the whole thing like it was butter, however.
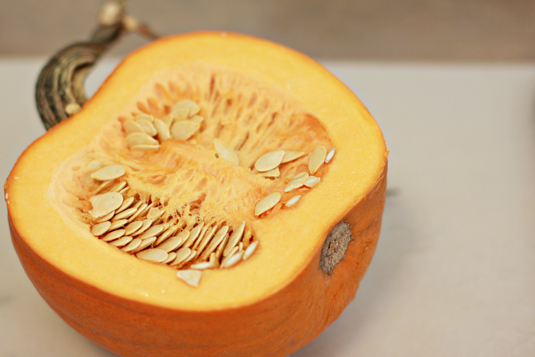
Using a spoon, scrape all the seeds and guts. I put them off to the side in a bowl and then separate the seeds to bake later.
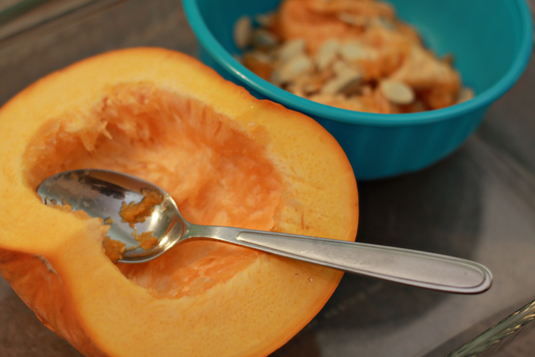
Keep scraping until all the strings are gone.
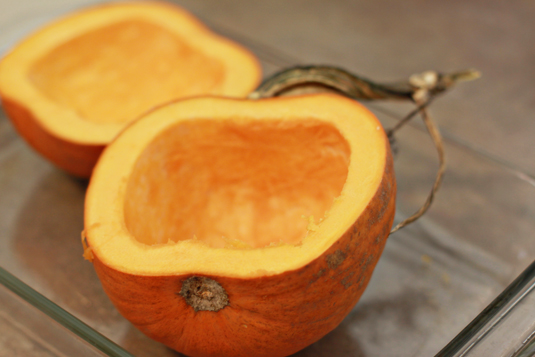
Place your pumpkin flesh side down into a baking dish large enough to hold both sides. I use a glass 9×13″ pan for this. Add 3/4 to 1 cup of water, just enough to come about 1/4″ up the side of the pumpkin. Stick it in the oven for an hour to an hour and 15 minutes depending on pumpkin size.
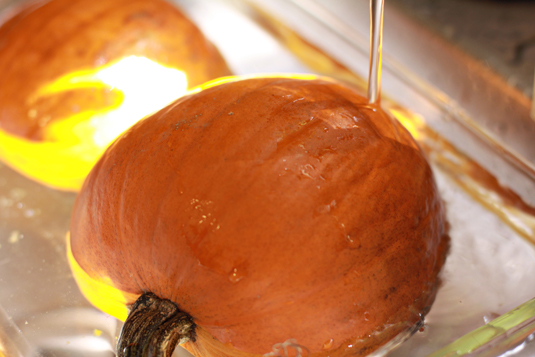
Your pumpkin shell should still be firm, but give a little when pushed. When you turn the pumpkin over, the flesh should start to have some translucence to it, and it should be easy to scoop out because that’s what you’re going to be doing to it.
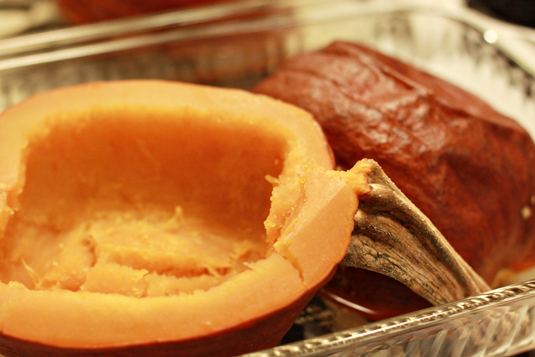
Scoop your pumpkin out directly into your food processor or blender, and pulse until you have a nice, even purée with no lumps. You can strain this through a cloth to get a thicker purée if desired.
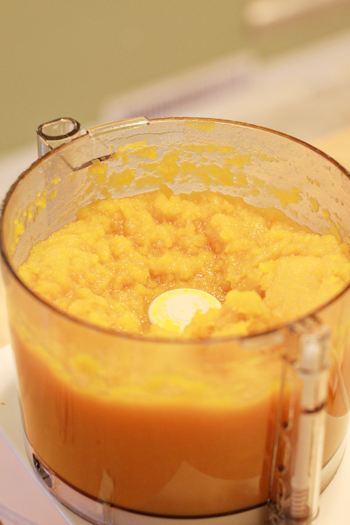
I use this in all my pumpkin recipes, from tarts, to pasties, to breads. I have a few new ones I’m excited to be sharing with you as well. I collect pumpkins and roast them while I clean or do laundry or other things around the house. I’ve been freezing the puree so I have it available all winter and later in the holiday season to bake with, and I can’t wait to start.
1 cup water
Preheat the oven to 350º F. In a 9×13″ baking dish, place pumpkin halves. Add water. Bake for one hour or until flesh is soft and easy to scoop.
Scoop the pumpkin flesh out, leaving behind the outer shell, and into a blender or food processor. Blend, pulsing until the purée is smooth and uniform in texture. Strain through a cloth to remove excess moisture. Store in airtight containers in the refrigerator for up to three days and in the freezer for up to three months.
Makes 2 to 3 cups pumpkin purée






Thanks for this encouragement. I make my own applesauce, sweet potato puree, etc. Why the heck do I buy canned pumpkin. I know this would taste so much better. Thanks for the tips. No more excuses now 🙂
I’m so glad you’re inspired! It is really quick and easy to do.
Great post! I need to get a pumpkin at the market today:)
I don’t know why I’ve never thought to make my own, but, duh! Of course it’s that easy to do! Great post!
Bless your heart, I was laying in bed last night thinking about this very thing, and how I wanted to avoid the canned pumpkin this year.
I think you are a mind reader (ha ha ha).
– Amy
It’s because we have the same glasses. 😉
Thank you so much. I want to avoid the canned version and your encouragement and method seems so easy 🙂
My mom used to make pumpkin pies out of real pumpkins and they were always stringy and a gross texture. I’ll have to try your recipe though ’cause those pictures look delicious!!
The blender or the food processor should cut up and potential strings. If you’re worried, pulse longer to get a uniform texture. You could also push it through a mesh sieve to make sure you’ve removed all of them.
Shaina, love your blog. Thanks for posting this… I’ve been wanting to make pumpkin puree for some time now, and your method is so easy. Looking forward to the pies that will result!! 🙂
Can it really be this simple? I think even I can handle this! Thanks for the photos and step-by-step.
Thanks for the encouragement! I’ve always wanted to try a ‘pie pumpkin’ but have been intimidated by the prospect, when the can seems so easy. But I really want to try using fresher ingredients. You make it look easy, so I am going to give it a shot this year!
Brilliant! I don’t know why I’ve never tried this. Thank you for the inspiration.
Hi, I’ve made pie from fresh pumpkin before and absolutely loved it. I’ve never stored it though and your posting was definately an encouragement. Thanks!
I so need to try this. There is no such thing as canned pumpkin here (I am not in the US) and I have been craving pumpkin pie and pumpkin muffins.
I’ve totally wanted to try this forever! I know what I’ll being doing while climbing Mt. Laundry this week! 🙂
Shaina, I just made my own the other day, too!
When making a pie, I have always bought canned, but no more… But, the ice cream I made with the beautiful FRESH and ORANGE pumpkin still turned brown. The spices and brown sugar were key to the colour change. I used sugar pumpkin and it was incredible all by itself. This is a beautiful how to post.
Thank you!
Valerie
I made some pumpkin puree and am using it to make a pumpkin cream cheese for babble post next week.
I’m the opposite! In the UK, except at the Wholefoods Market, canned pumpkin is tres tough to come by – so I have to make my own pumpkin puree/canned pumpkin. It’s hard work! But I guess it’s worth it!
I’m embarrassed to say, I have never made my own pumpkin puree. I love you tutorial on how to do though, so I think I will be giving it a go before the season is over!
Hi,
Just to clarify, one should stick with sugar pumpkins or some other variety of “pie” pumpkins, NOT the jack-o-lantern pumpkins. I tried the regular pumpkins and the puree is just too watery and bland. Wouldn’t you agree??
I think the rule tends to be, the bigger the pumpkin the more water they have. So I am with you on this!
Definitely. Small with dark orange skin is best, and go for one in the 3- to 4-pound range.
You are such a good mama!
I just wanted to add a few things: Canned pumpkin shouldn’t be under shortage anymore, they hope to have all the shelves stocked before Thanksgiving.
Homemade is much better!
Now that it is getting colder, I appreciate the oven directions, but you can always use the same directions to microwave, just your time would switch to about 12 minutes. I have also used my steamer, after cutting the pumpkin into chunks. I have used larger regular pumpkins, and used them for bread or muffins. They aren’t as orange, more of a yellow color, but they work pretty well.
I also use some of the puree for baby food. It gets gobbled right up!
Also – save your scoop out of those pumpkin carving kits you buy every year, it works terrific for carving the seeds and strings out of squash year round. Much better than a spoon.
OMG! THANK YOU!!! Where I live (Cyprus) we have no canned pumpkin. The climate also doesn’t allow pumpkins to grow here and I only get my chance once a year to do what you just described, when pumpkins are imported. Last year, I failed! But now that I read your post, I’m exited to try again. I sliced the pumpkin in small pieces instead of cutting it in half. Of course it burned on the sides and it was still raw in the middle. I’m so sxited you have no idea!!!
But just 1 question: If you don’t strain the mixture, do you need to adjust the liquids of the recipe? Or does it not make a difference?
Thanky ou thank you thank you!!!! xoxoxoxoxo
thanks for this “how to” post! i’m going to give it a try.it doesn’t look to difficult…i do have the same question as joy about not straining the mixture…do you adjust the liquids part of the recipe (specifically the pumpkin coffee cake that you just posted). i can’t wait to try the coffee cake….! YUMMY!!!
Hi, Heidi! I strain my liquid off depending on the pumpkin. Each pumpkin will have a different amount of water content, and that will affect the results. I aim for a consistency of canned pumpkin puree for consistency. If it looks runny after it’s been through the food processor, then I strain through a cheesecloth. 🙂
Thanks for this!
My Squeezo strainer manual didn’t mention what to do with the “discarded pulp”. It should still be viable for puree since the seeds, strings, & skin were all removed. Seeing that you used all of the pumpkin encouraged me to use it.
I’ll add some of the extra pumpkin juice with some apple and see how it goes through the food processor. If it doesn’t come out smooth enough, well, the chickens will still love it!
Have you thought about saving the seeds from your sugar pies for planting?
We usually grow one vine each summer, and I save a few seeds for starter plants in the spring. Otherwise, I soak, salt, bake and eat those seeds. 🙂
Where do you buy a cheesecloth for straining? And do you wash and reuse cheesecloth or is it a disposable item? Sorry for the novice questions! Thanks!
Several grocery stores will have them in the baking aisle. Otherwise, there are several online stores that will sell them as well, or any kitchen store should have them (sur la Table, Williams Sonoma, etc.). You can wash and reuse them. I wash my cheesecloth by first rinsing it with the sprayer in my sink, and then I fill a bowl with hot water and open the cheesecloth up and agitate it in there to remove food particles. Then I just wash and dry as normal.